


%20Reso%20100.jpg)
WHAT IS GREENEDGE?
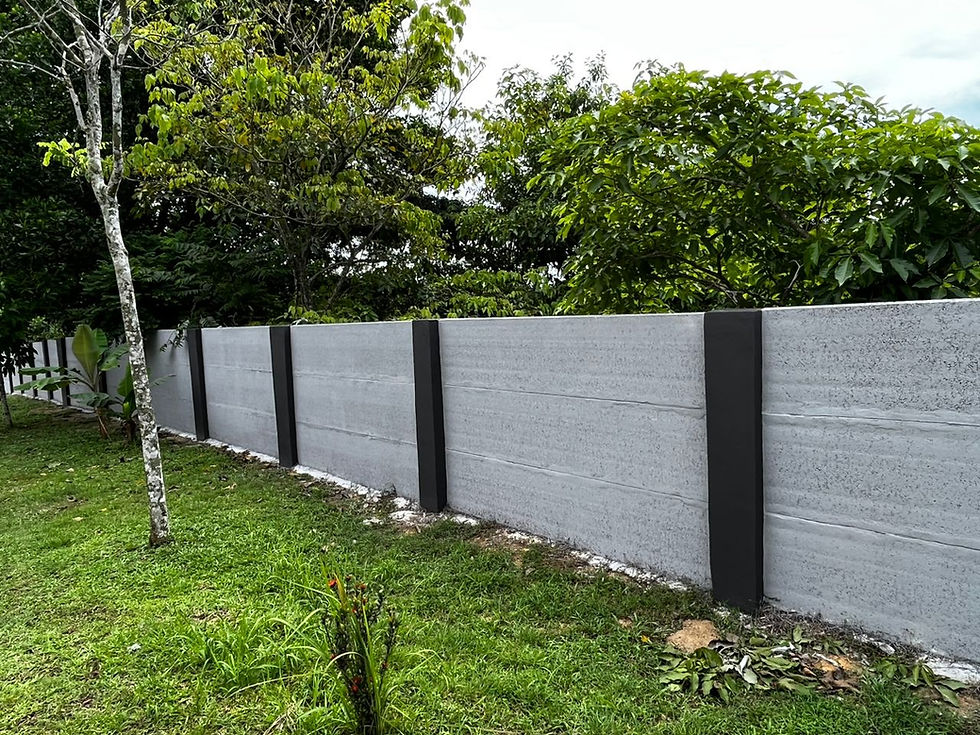
GreenEdge offers a versatile, easy-to-install IBS precast wall system designed for non-load bearing applications across various sectors. Ideal for residential buildings, public facilities such as hospitals, schools, and service flats, GreenEdge is also well-suited for use in warehouses, security fencing, and noise barriers. Constructed from high-quality concrete, the system provides excellent resistance to moisture and temperature fluctuations while offering superior sound-dampening properties, making it a reliable choice for a range of environments.
WHERE TO USE?
GreenEdge wall panels are specifically designed for environments where superior sound insulation is essential, making them an excellent choice for bathrooms, kitchens, and shower rooms. Engineered to meet the highest industry standards, GreenEdge panels offer exceptional durability, withstanding seismic activity while providing robust moisture and fire resistance. In addition, GreenEdge wall panels are fully recyclable, reflecting our commitment to sustainability without compromising on performance.

MULTIFUNCTIONAL APPLICATIONS
At GreenEdge IBS Light Weight Wall Panel, we take pride in everything we produce. Although our industry has changed immensely over time, there are some things that remain constant such as our attention to detail, the quality of our goods and our care for those who use our products. Please browse our site to get a better idea of who we are and what we do.


ADVANTAGES
OF GREENEDGE IBS WALL PANEL
Building with GreenEdge panels is six times faster than traditional brickwork and twice as fast as blockwork. GreenEdge panels offer time and labor savings of up to 50% compared to conventional partition wall building methods. In addition, GreenEdge wall panels have a thin structure, which means more floor space to use for other purposes in the building.

1
ECONOMICAL
-
GreenEdge wall offers lower initial as well as long-term costs when compared with other materials due to low product costs, elimination of plaster, no curing, no zari-work for conduiting, no lintels, no stone sills, no maintenance, no flaking/cracks, increased carpet area as well as flexibility to move partition walls when required.
-
Lighter weight of the walls allows for lower dead weight thus reducing structural steel costs.
4
LOW MAINTENANCE
-
No problems like leaching of salts from bricks over time. No cracking, flaking of plaster due to one homogeneous material. No plastering means additional saving on time, quality, maintenance etc.
6
SAFETY & WELL PROTECTION
-
Provides excellent protection against impacts from intrusion, slamming, explosions, vehicles and projectiles.
-
High fire ratings between 120 mins and 180 mins.
-
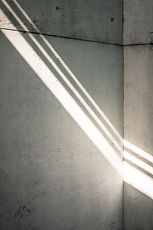
Good Sound insulation.
-
Have passed tornado / hurricane / heavy rain-sleet-hail impact testing in most of the countries with severe weather, giving owners an added level of safety assurance in areas prone to severe weather.
9
ENVIRONMENTAL FRIENDLY
-
No curing means massive water savings during construction.
-
Lower raw material used than with other partitions and all raw material composed of natural materials that are nontoxic and environmentally safe.
-
Given green building material status in Malaysia, Singapore and many other countries due to its very low energy used compared to other options.
2
EASE OF INSTALLATION & EFFICIENCY
-
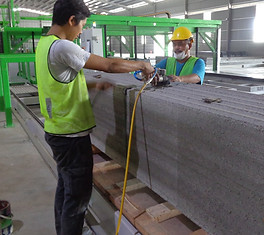
GreenEdge wall is factory made, transported to the site ready to install on pallets and manually erected on concrete floors. Highly versatile and fast to install, requiring just two regular construction workers to install up to 6m2 per hour and are pre-cured thus do not require any curing. Can be cut, sawn and dimenzioned as per requirement for installation at site.
-
Projects utilizing GreenEdge wall can save weeks or months over other materials due to no prep work, fast installation, no curing time requirement and time saving with plumbing, electrical and HVAC conduiting.
5
SUPERIOR STRENGTH
& DURABILITY
-
No problems like leaching of salts from bricks over time. No cracking, flaking of plaster due to one homogeneous material. No plastering means additional saving on time, quality, maintenance etc.
7
CONSISTENT QUALITY
-
Because precast concrete products are typically produced in a controlled plant environment, they exhibit high quality and uniformity.
-
Problems affecting quality typically found on a job site - temperature, curing conditions, craftsmanship and material quality - are nearly eliminated in a plant environment.
10
CONSISTENT QUALITY
-
GreenEdge wall thanks to its quality finish, get a horizontal and vertical flatness, without any joint feel. Painting can be done directly or after applying a 2mm wall skim coat. Texture paint coat can be directly applied to external surfaces for decorative effect.
-
All Tiling and Cladding can be directly fixed using regular cement mortar or tile adhesive or equivalent.
3
AESTHETICALLY & FUNCTIONALLY BENEFICIAL
-
On account of their factory finish they are aesthetically pleasing. Due to its availability in different heights and thicknesses with no load-bearing application it provides total design flexibility.
-
More carpet area due to lower thickness of 75mm and 100mm instead of brick partitions of 150 mm with plaster on both sides.
-
No lintels need to be cast as panels can be place horizontally as lintels where required.
-
Due to its consistent line, length and levels GREENEDGE walls do not require stone or wood sills/frames to level surfaces for windows and openings.
-
Hanging wash-basins, cup-boards, mirrors, paintings with regular plug screws possible and can take as much as 250 kg of load. Drilling, Nailing, Hammering as in any normal brick-plaster wall.
-
Good workability, Less mess in installation, no curing, minimum waste at site and quick installation contribute to better site management.
8
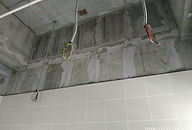
EASY M&E INSTALLATION
-
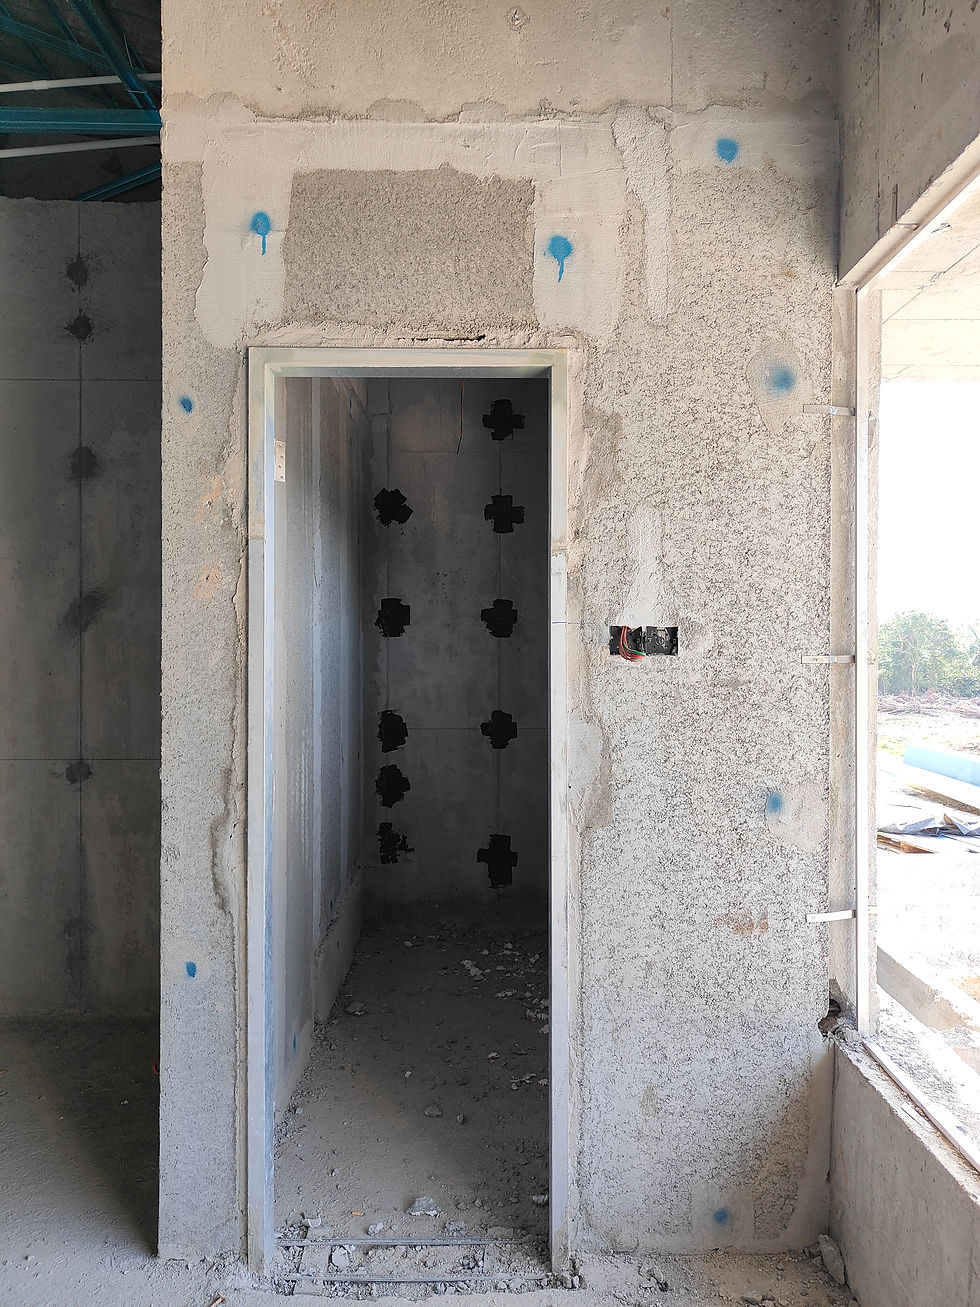
GreenEdge walls have hollows of 44mm diameter in the 75mm wall and 68mm diameter in the 100mm wall to allow the passage of water pipes, electrical wiring, HVAC and hydraulic installations without making holes/chases.

UNBEATABLE QUALITY
TECHNICAL SPECIFICATIONS
PRECISE DIMENSION . EVEN SURFACE . HIGH PANEL QUANTITY
There’s so much happening behind the scenes of GreenEdge IBS Light Weight Wall Panel to ensure our clients receive the most quality, reliable products possible. To bring our exceptional production process to light, we’ve outlined the key features below.
Keep reading to learn the benefits you’ll receive when you choose to do business with us.

WALL PANEL DIMENSION

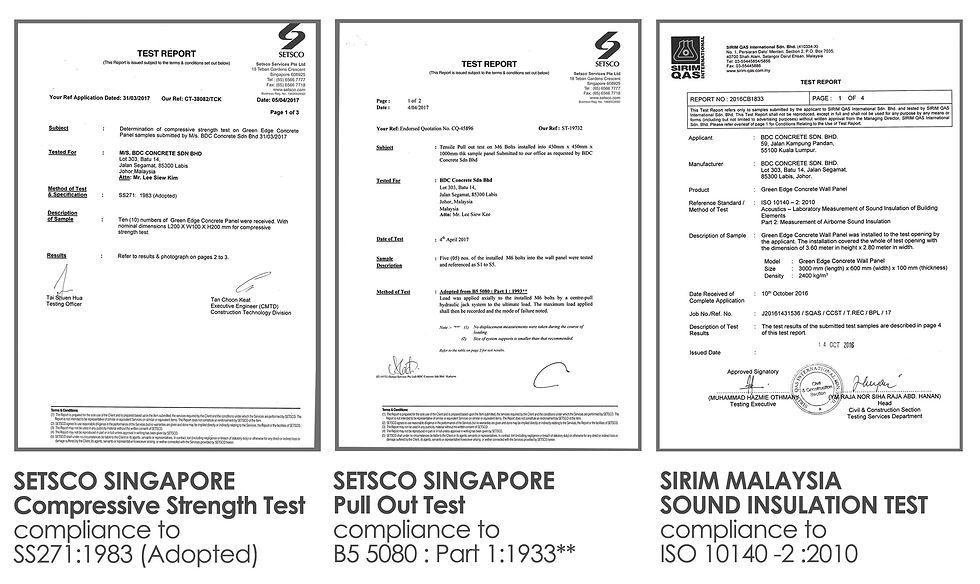
TESTS, ACCREDITATION & CERTIFICATIONS
QUALITY YOU CAN REPLY ON
Over the years, we’re proud to have garnered the trust and loyalty of countless customers.
That’s because our products are built with quality materials and the latest technologies to meet the highest industry standards.
Keep reading to learn more, and reach out with questions on what we have to offer.


ADVANCED TECHNOLOGY
FOR EFFICIENT PRODUCTION
PRECISE DIMENSION . EVEN SURFACE . HIGH PANEL QUANTITY
Industrialized panel production process translates into exact panel dimensions and flat panel surface.
The panels are therefore easy and quick to install, no plastering is needed at the construction site.
UNCOMPROMISED
PRE-INSTALLATION PREPARATION
PRECISE DIMENSION . EVEN SURFACE . HIGH PANEL QUANTITY
There’s so much happening behind the scenes of GreenEdge IBS Light Weight Wall Panel to ensure our clients receive the most quality, reliable products possible. To bring our exceptional production process to light, we’ve outlined the key features below.
Keep reading to learn the benefits you’ll receive when you choose to do business with us.

STEP 1:
DRAWINGS PREPARATION & PRODUCTION PLANNING
Upon receiving confirmation of order from the client, GreenEdge shall request a set of architectural and structural drawings for the purpose of producing GreenEdge Installation Shop Drawings and Sizing Tabulation.

STEP 2:
PRELIMINARY CLIENT BRIEFING
Prior to the first delivery, GreenEdge technical personnel shall conduct a preliminary briefing to client and/or his project consultant, main contractor, sub-contractor (whichever is relevant) and wall installer (if applicable). This is to identify the key person at site; to determine the job scope of all related parties; to ensure the requirement of installation works are in line with our Installation Method Statement and Shop Drawings; to highlight the DOs & DON'Ts, etc.

STEP 3:
INSTALLATION METHOD & REQUIREMENT BRIEFING
Before the installation, the GreenEdge technical personnel shall coach the installer to ensure they fully understand and adhere to the correct method of installation and tools to be used. Coaching on planting of T10 starter bars before slab casting will also be conducted. During the coaching session any doubt raised by the installers will be clarified.

STEP 4:
PRE-DELIVERY PLANNING
& COORDINATION
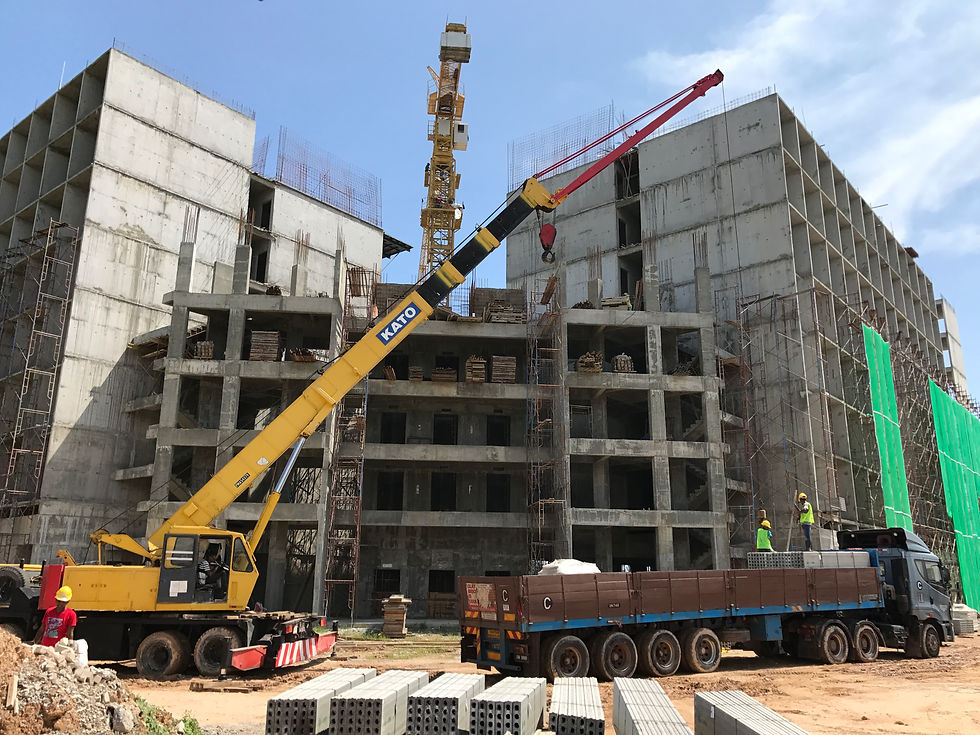
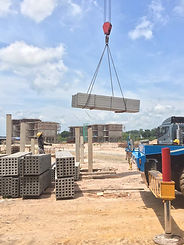
GreenEdge shall inform the client site representative the anticipated date of arrival of the GreenEdge panels in advance. It is for the client's earlier arrangement for a crane or similar to unload the panels from the trailer to the designated location.
STEP 5:
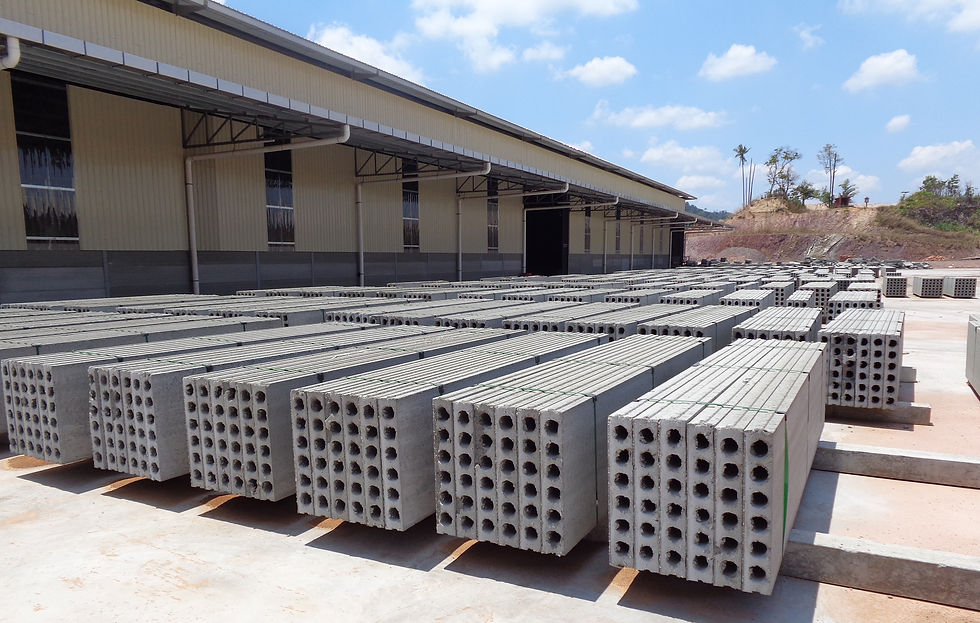
PANELS PACKING & DELIVERY ARRANGEMENT
GreenEdge panels shall be packed and strapped in pallets. GreenEdge pallets are then to be loaded onto the trailer by using crane or forklift. The pallets can be stacked for a maximum of two layers, one above the other.

STEP 6:
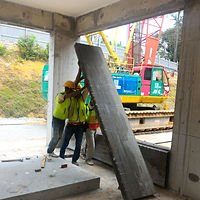
DELIVERY & UNLOADING ARRANGEMENT & HANDLING
Upon arrival at site the GreenEdge panels are unloaded from the trailer using a crane or a forklift. Unloading platform & pallet jack / trolley are required for high-rise construction.
STEP 7:
QUALITY VERIFICATION & ON-SITE COORDINATION
The receiver of the GreenEdge panels must check and verify the quantity of panels delivered against the Delivery Order. Panels that found cracked or damaged, the receiver must clearly record the relevant information on the Delivery Order, in the presence of the trailer driver. The trailer driver is required to sign on the Delivery Order as acknowledgement of the defects. The Delivery Order is required to be stamped and signed by the client's representative as proof of the delivery.

STEP 8:
STORAGE OF PANELS AT DESIGNATED LOCATION
The GreenEdge panels must be stored on a flat ground and must not be stacked for more than two layers. For high-rise buildings, the panels should be stored near to the crane hoisting area to avoid double handling / transferring.
.jpeg)
STEP 9:
STORAGE & HANDLING OF ADHESIVE MORTAR
GreenEdge Adhesive Mortar must be stored in a dry area and under a shelter or covered with water proof material. The shelf life of GreenEdge Adhesive Mortar is six months.

GREENEDGE
INSTALLATION PROCESS
SPEEDY INSTALLATION, MAXIMIZING PROFITABILITY
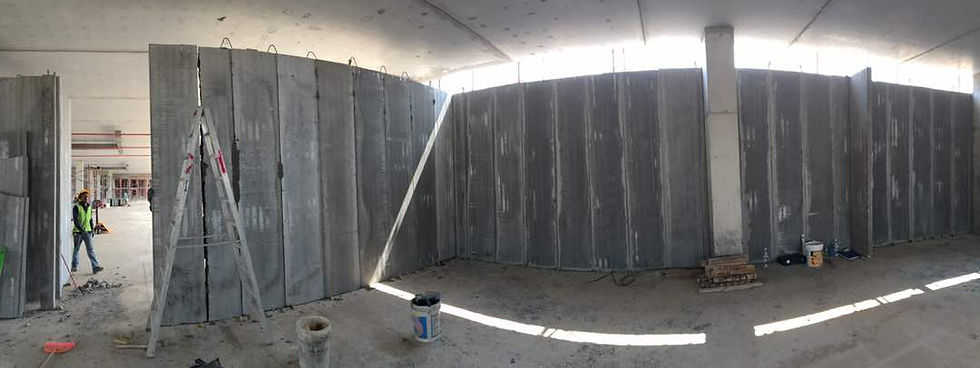
Installing the GreenEdge wall panels does not require special skills.
It is cost-efficient and quick – up to 90 m² per 8 hours due to its standardized shape and light structure. To install the panels, just need to simply lift them to an upright position and cemented together to the floor and to the ceiling. The installation of GreenEdge wall panels is up to six times faster than the use of traditional construction methods, such as brickwork or laying block walls.

SITE PREPARATION
To identify the areas to install the GreenEdge panels.
To clean and mark the area by referring to the architectural drawing.
DISTRIBUTION OF PANELS
Distribute GreenEdge panels to the areas where installation needs to take place by using pallet jack or trolley.
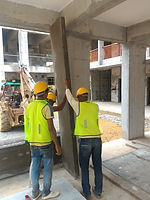
LIFTING & ERECTING OF PANELS
Unwrap the GreenEdge panels, lift them up, erect and arrange the panels accordingly.
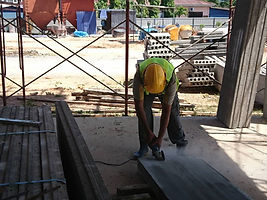
CUTTING OF PANELS
It is recommended to use an appropriate tools i.e. concrete cutter for any cutting on GreenEdge panels.

ADHESIVE MORTAR PREPARATION
To prepare GreenEdge Adhesive Mortar with a mixing ratio of 4 : 1. That is 4 parts of GreenEdge Adhesive Mortar to 1 part of water. Mix with an electrical mixer to achieve a homogeneous mix.
The pot life of GreenEdge Adhesive Mortar mixture is 30 minutes. Do not re-mix the dried mixture.
POSITIONING THE PANELS
To position the panels at the designated area and align it vertically and horizontally by using a crow bar and a spirit level.

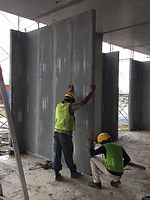
INSTALLING THE PANELS
Always start the panels installation at a column or at an area where the panels will be intersected to form an “L” or “T” joint. Apply adequate GreenEdge Adhesive Mortar at all the structural members that will be connected to GreenEdge panel, such as column, slab & beam, next erect the panel and start to install. The marked/ painted side of the panel must always be installed at the bottom of the wall.

FIRMING THE PANEL POSITION
Hold the panel firmly by means of thrusting wooden wedges between the wall panel and the beam/slab soffit. These wooden wedges must be removed before finishing the installation works.
Ensure a gap of 20 - 50mm between the GreenEdge panel and the beam/slab soffit for GreenEdge Adhesive Mortar application.

SUBSEQUENT PANELS INSTALLATION
To install the subsequent panel, apply GreenEdge Adhesive Mortar to the groove of the previous panel and then interlock the tongue of the second panel into the groove of the previous panel.

INSTALLATION OF LINTEL
For area where GreenEdge panel is used as lintel, prior to the installation, create an L-shape rebate of 100mm width at the adjacent panels at both side as supports for the lintel to sit on it. At place where the lintel is to be connected to a R.C. element, install an T10 steel bar as a support for the lintel. Both sides of lintel must be anchored with dowel bars to connect to the adjacent members.

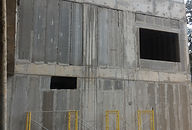
GREENEDGE PANELS FOR WINDOW & OTHER OPENINGS
Below the window, each panel must be anchored using U-bar (T10 Steel Bar) and a topping has to be casted over it in such a way that the two ends of the capping slots about 10mm into the sides of the panels by the side of the window.
In case of the gap between panels or panel and column which is lesser than 200mm, fill the gap with cast in-situ concrete.

GREENEDGE STEEL BRACKET
INSTALLATION
For the panel which is adjacent to R.C. column / wall, 2 nos. of 150mm T10 steel dowel bars (side) are required.
For external wall, GreenEdge steel bracket (Top) & 150mm T10 steel anti-slip bar (Bottom) is required for every panel. For internal wall, GreenEdge steel bracket (Top) & 150mm T10 steel anti-slip bar (Bottom) is required for every alternate panel.

ANTI-SLIP BARS & DOWEL BARS INSTALLATION
To implant anti-slip bars and dowel bars, first drill a depth 50mm hole on the R.C member. Next, fill up the hole with grout and then insert the T10 steel bars.
SEALING OF STARTER BARS
& DOWEL BARS
After the panels are installed, patch up all the openings for starter bars and dowel bars with cement mortar.
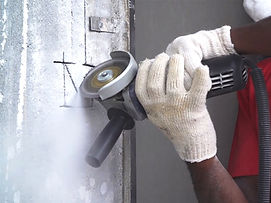
MECHANICAL & ELECTRICAL (M&E) OPENINGS
Proceed with the M&E works. All the openings for M&E must be created with electric cutter. Hacking with hammer and/or other inappropriate tools is prohibited.
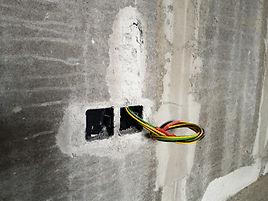
PLUMBING & ELECTRICAL INSTALLATION
GreenEdge wall with hollows of 44mm diameter in the 75mm wall and 69mm diameter in the 100mm wall to allow the passage of water pipes, electrical wiring, HVAC and dydraulic installations without making holes/chases.
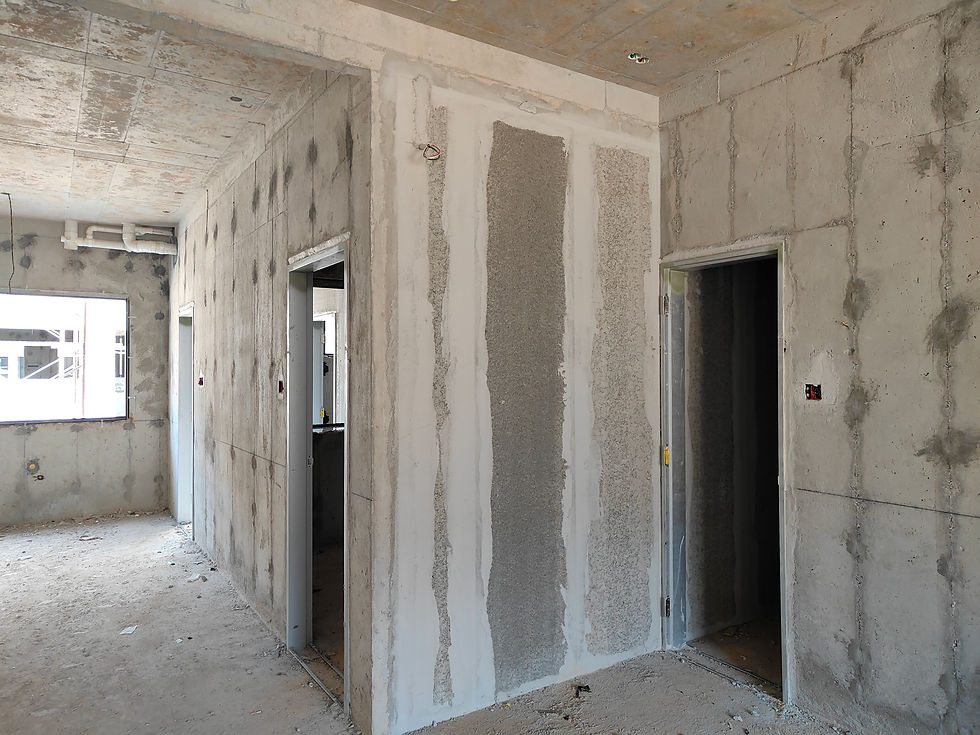
FILLING OF GAPS BETWEEN PANELS
This is your Product Description. Write a short overview of the product including important features, pricing and any other relevant information for a potential buyer. Make sure your text is clear and easy to read. Tip from the pros: add an image or video of the product to give your clients a way of visualizing what you are selling.

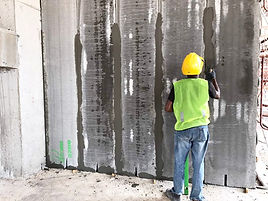
FIBER MESH INSTALLATION
Once the GreenEdge Adhesive Mortar is flushed at the gaps between panels, apply a layer of fiber mesh (100mm width) at all joints. Use GreenEdge Adhesive Mortar as the adhesive for the fiber mesh application.

SKIM COATING
This is your Product Description. Write a short overview of the product including important features, pricing and any other relevant information for a potential buyer. Make sure your text is clear and easy to read. Tip from the pros: add an image or video of the product to give your clients a way of visualizing what you are selling.
GREENEDGE PRIMER
ADVANCE TECHNOLOGY COPOLYMER RESINOUS BONDING AGENT
Water-based resinous bonding agent used on base substrate for cement mortar and all kinds of cementitious products.
Single component, water based with non-toxic and non-inflammable concrete PVA copolymer and medium viscosity that have been polymerize into resins that are suitable at high humidity exposure. Most suitable to used as solution for debond, crack, efflorescence, coalescence two difference material and moment joint/cold joint.
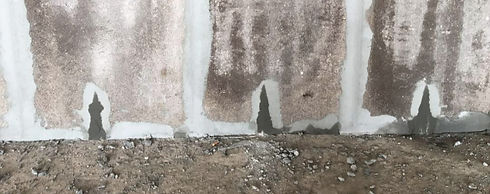
EFFECTIVE WAY TO RESOLVE WALL CRACK ISSUES